Sourdough starter is an active culture of yeast that gives bread its signature tangy flavor. It primarily contains lactic acid bacteria and wild yeast, the microorganisms responsible for fermentation. Because your starter is alive, it needs to be fed regularly to stay healthy and active. Keeping your starter strong is the key to unlocking its full baking potential.
Why Feeding Your Starter Is Important
You need to feed your starter regularly so you don’t end up killing it. Like any living thing, it can be healthy and thriving or just barely hanging on, and the difference shows up in the quality of your bread. The timing of feedings also matters. A starter you fed two minutes ago isn’t ready to bake with, and one that’s too mature won’t give you the best results either. That doesn’t mean it’s wasted, though. Overripe starter can be used to create more starter or repurposed into tasty recipes that make great use of sourdough discard. Check out some sourdough discard recipes here!
When to Feed Your Sourdough Starter
The best time to feed your starter is whenever you can do it consistently. Consistency is what keeps your starter strong and reliable. You’ll hear about all kinds of feeding schedules, but the truth is that the best routine is the one you can actually stick with. Think about how often you want your starter ready, whether that’s at a moment’s notice or just once in a while.
There are two main approaches: keep it at room temperature and feed it multiple times a day so it’s always active, or store it in the fridge to slow fermentation. The fridge method requires less frequent feeding, but you’ll need to plan ahead and feed it before baking so it has time to ripen. And if you miss a feeding? Don’t panic. Starters are surprisingly resilient. Simply give it an extra feeding or two before your next bake and it will bounce back.
What You’ll Need to Feed It
To feed your starter, you only need a few basics: starter, flour, and water. You’ll also want a scale for accuracy and a container to store your freshly fed starter. When it comes to flour, I typically use 100% bread flour, but you’ll find countless opinions online about which flour is “best.” The truth is, there’s no single right answer, experiment and see what works for you.
At its core, feeding is simply giving your yeast more fuel from the flour so it can stay active and alive. There’s no need to overthink the process (and definitely no kneading required). One simple but effective trick is to wrap a rubber band around your container at the starter’s initial height. This makes it easy to see how much it rises as it ferments, which is the best indicator of how healthy your starter is.
How to Feed Sourdough Starter (Step-by-Step Guide)
Everything has to do with weight!
When it comes to sourdough, weight is everything. All measurements will be by weight and typically grams. Measuring by cups or spoons might work for a quick batch of cookies, but it’s completely unreliable for your starter. A cup of flour can weigh anywhere from 110-150 grams depending on how packed it is, how humid it is, or even who’s scooping it. That kind of inconsistency will throw your ratios off. While your starter is pretty forgiving and won’t die over a sloppy measurement, once you move on to actual bread baking those inconsistencies can make a big difference in texture, rise, and flavor. Using a scale removes all the guesswork out of your baking. You’ll know exactly how much starter, flour, and water you’re working with every time. And honestly, a kitchen scale costs around twenty bucks. If you’re serious enough about sourdough to maintain a starter, just get one. It’s the single most important tool you’ll use.
What You’ll Need to Feed Your Starter
Ingredients
- Starter – the portion you’re keeping alive
- Flour – bread flour is a great place to start, but experiment as you go
- Water – warm, filtered or tap is fine
Optional Tools, but are they really optional?
- Kitchen scale – not really optional if you want consistency (seriously, just get one)
- Container – glass or plastic works fine, as long as it’s clean and not airtight. Taller containers with straight walls are easier.
- Stirring tool of choice – spoon, spatula, or chopstick, whatever you prefer
How to Feed your Sourdough Starter
- Determine your ratios
First, decide how much of your starter you want to keep and feed. There are countless options out there, but for beginners I recommend a 1:1:1 ratio: equal parts starter, flour, and water by weight. - Measure and add ingredients
Place your container on the scale, tare it (i.e. Zero it), and weigh out the starter you’re keeping. Add the same weight of water and flour. The order doesn’t matter, but adding flour last usually keeps things a little cleaner. - Mix it up
Stir until everything is fully combined into a thick, smooth paste with no dry flour pockets. - Mark the level
Use a rubber band or marker on your container to note the starting height. This makes it easy to track how much your starter rises as it ferments. - Let it rest
Cover loosely (with a lid or cloth) and let it sit at room temperature. Over the next several hours, it should grow, bubble, and develop that tangy sourdough smell. - Know when it’s ready
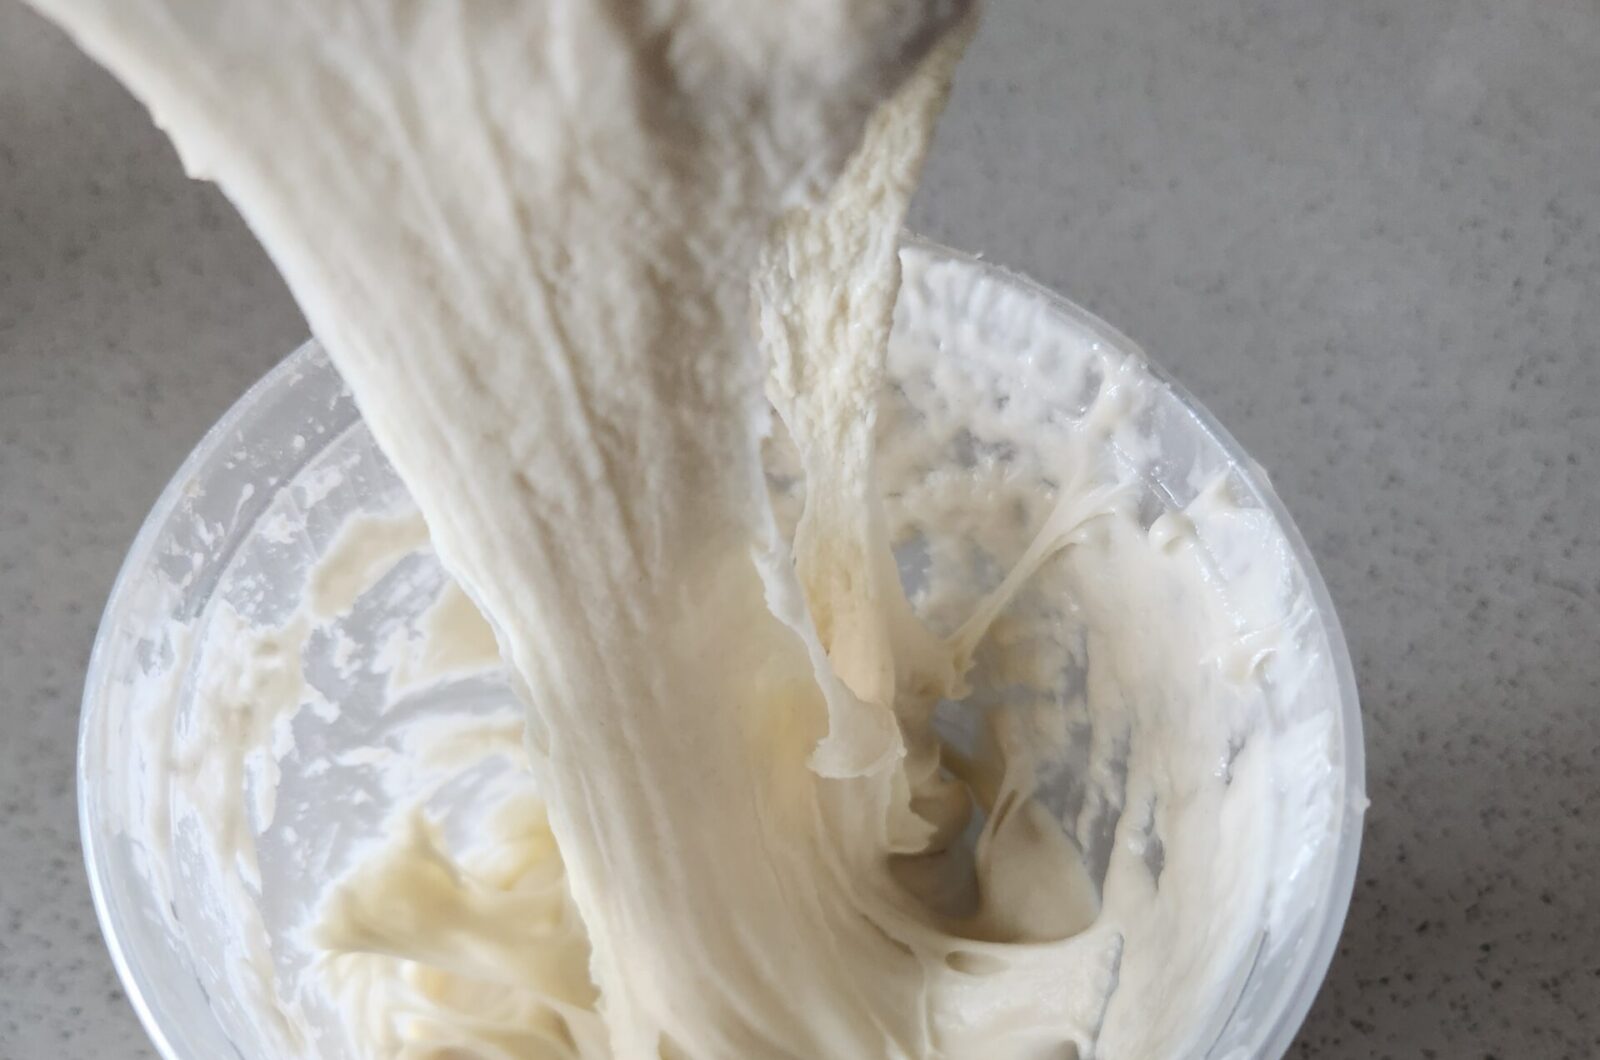
Your starter is ready to bake when it has at least doubled in size, looks airy and bubbly, and passes the float test (a spoonful dropped in water should float).
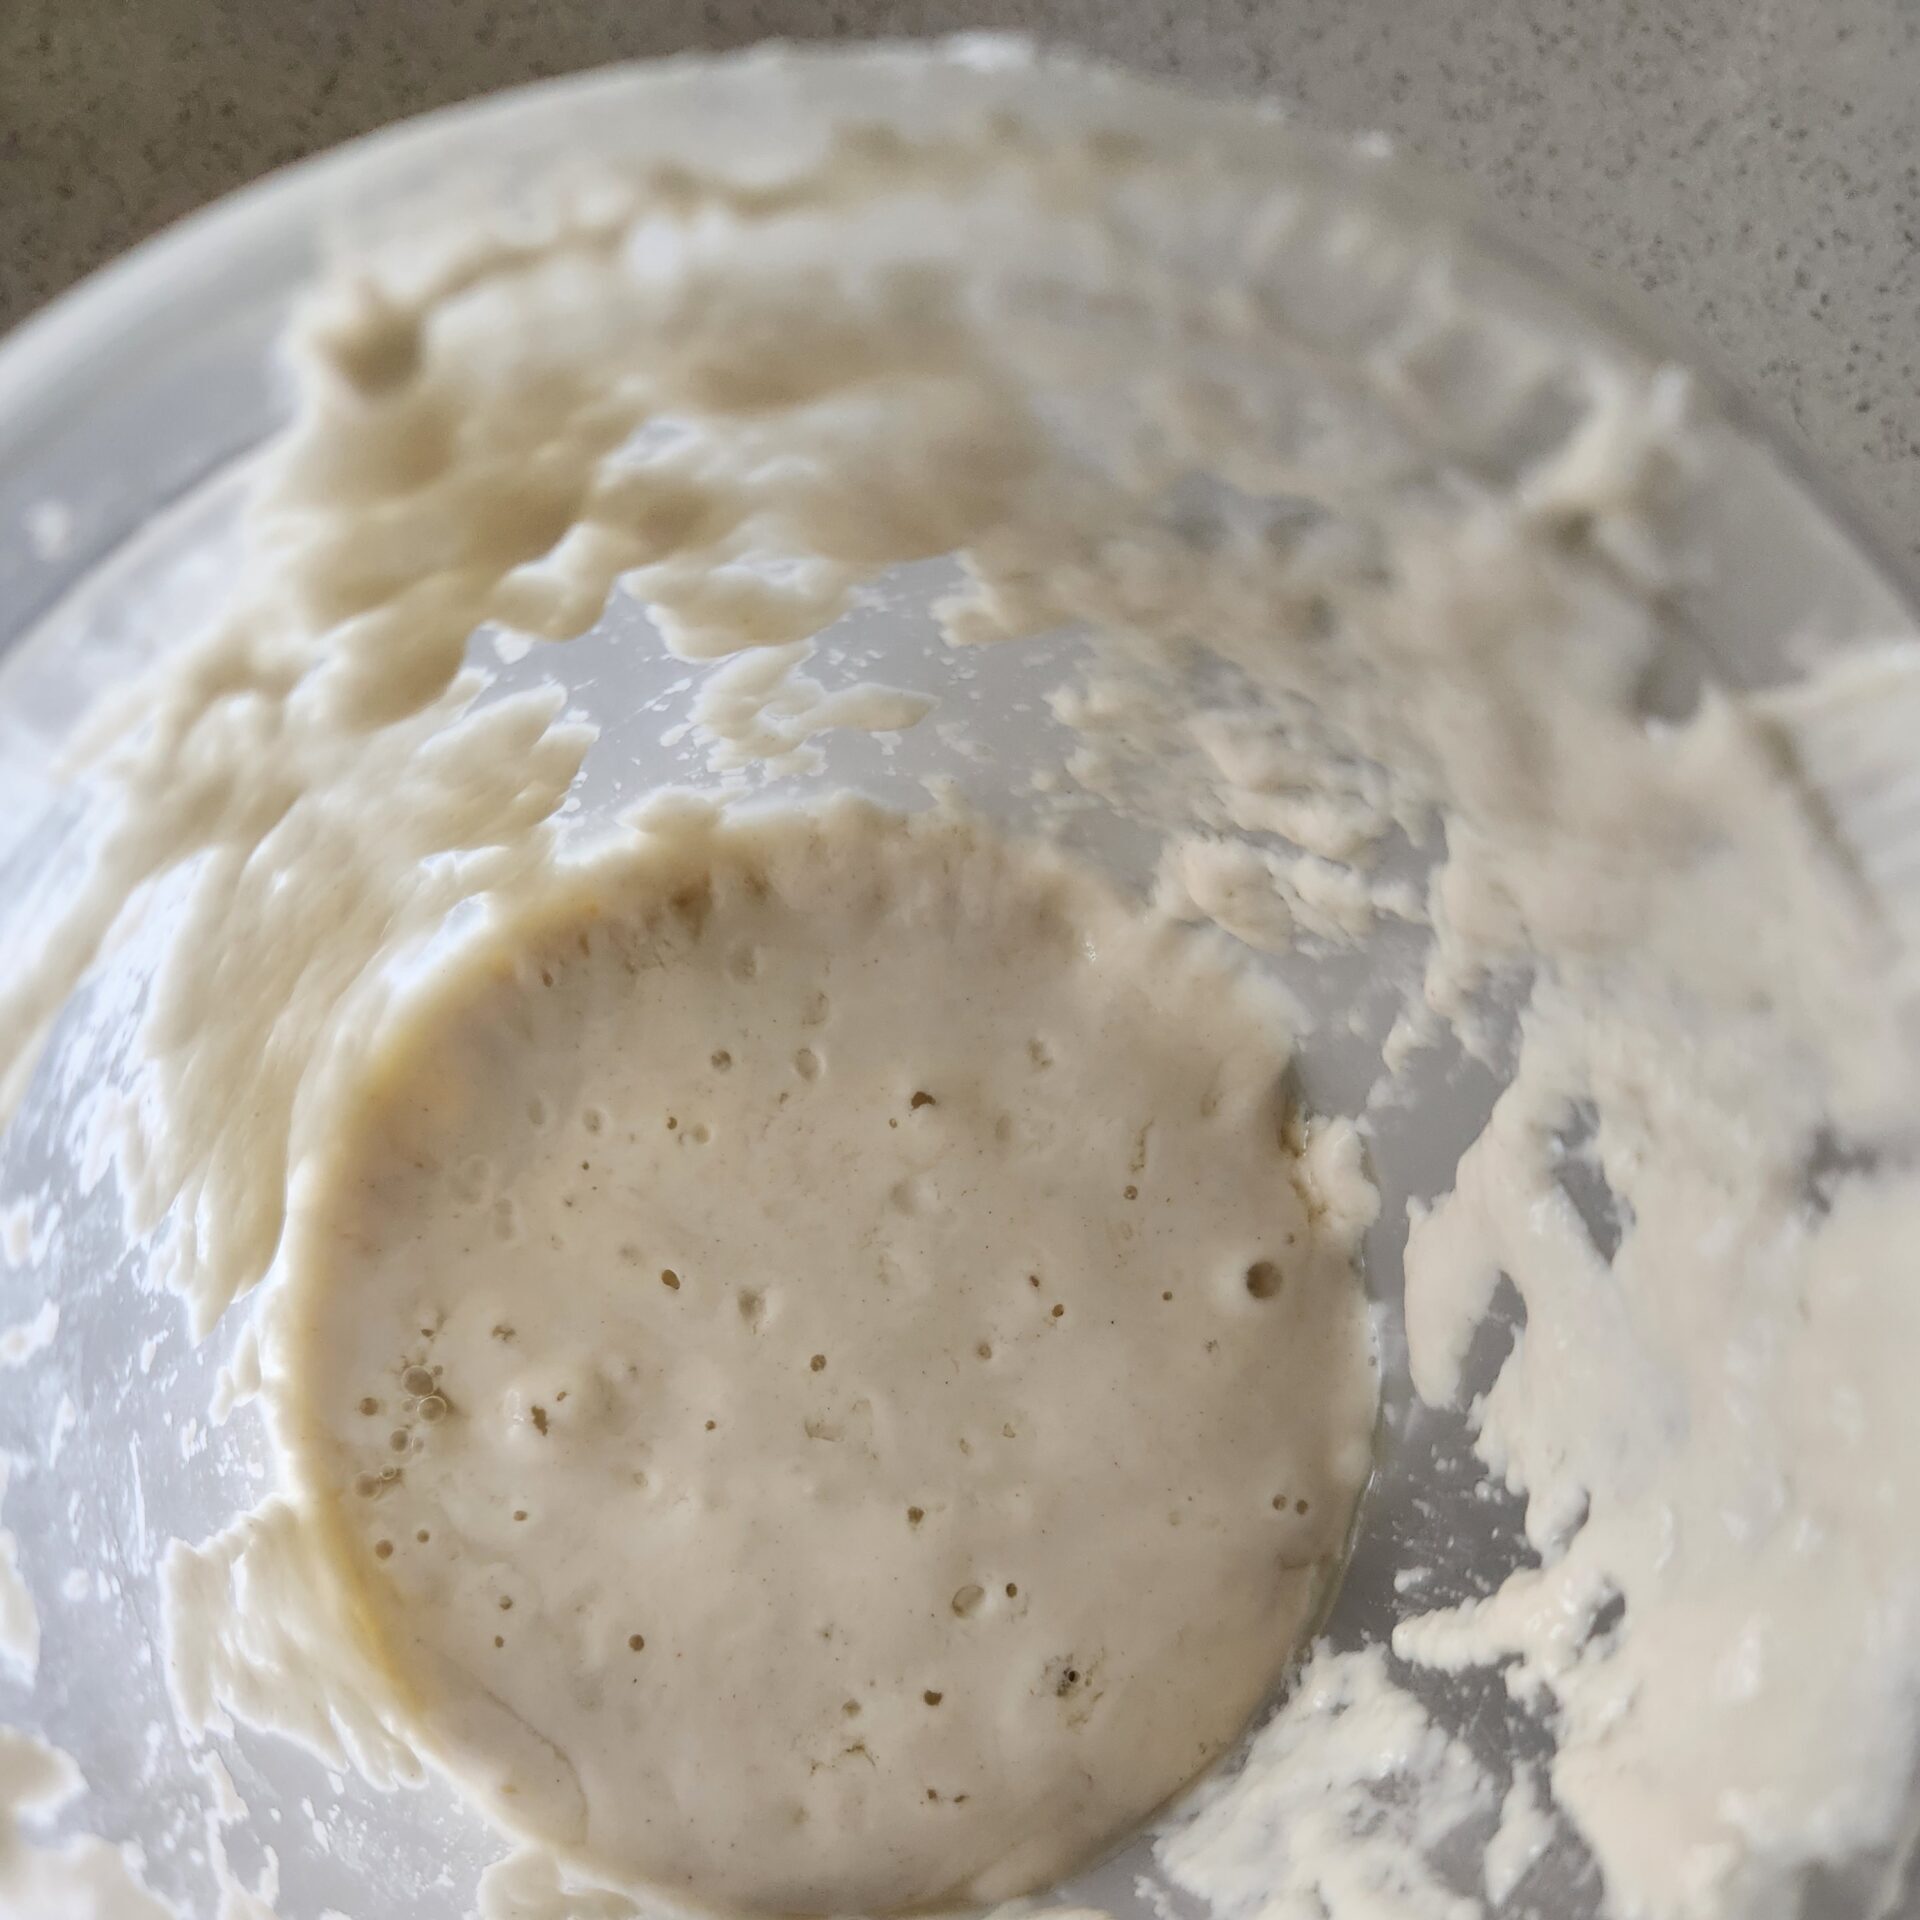
How to Tell If Your Starter Is Healthy
A healthy starter is easy to recognize once you know what to look for.
Signs your starter is in good shape:
- Creamy or slightly yellow in color
- Lots of bubbles throughout, showing active fermentation
- A domed top, which means it’s rising well
Red flags to watch out for:
- Strong, foul odors (it should smell pleasantly sour, not rotten)
- Mold on the surface
- Extreme heat exposure that “cooks” the starter
- Strange colors like orange, pink, or green
If you suspect your starter isn’t healthy, feed it right away to try and revive it. And remember, a sour smell is normal, but it should never smell truly terrible.
Sourdough Feeding Mistakes to Avoid
Even though sourdough starters are resilient, there are a few mistakes you’ll want to avoid. If you see mold growing on your starter, throw it away and start fresh. This is the one issue that can’t be fixed. For just about everything else, from strange smells to sluggish activity, you can usually bring your starter back with consistent feedings.
It’s also important to be patient. The environment in your kitchen plays a huge role in how quickly your starter ripens. In a warm kitchen, it may be ready in just a few hours, while in a cooler space it could take a full day or more. Don’t rush the process.
Always measure in grams rather than ounces. Precision is key, and grams give you the consistency you need to keep your starter healthy and reliable. And finally, never use hot water. Hot temperatures can kill the yeast and bacteria that make your starter thrive. Warm is fine, hot is not. ~80 deg F is ideal and anything over 120 deg F is killing your starter
Storing and Maintaining Your Starter
Choosing the right container makes maintaining your starter much easier. A clear container is best because it allows you to check on your starter at a glance and monitor its growth. Glass or plastic both work well, but straight-sided containers are ideal since they make it easier to track volume changes as the starter rises and falls.
Where you store your starter will depend on how often you plan to bake. Keeping it in the fridge slows fermentation and lets you maintain a more relaxed feeding schedule. This is perfect if you bake only occasionally. If you want your starter ready to use more frequently, keeping it on a warm counter will keep it active and rising quickly, though you’ll need to feed it more often.
What to do with You Sourdough Discard
Sourdough discard is the portion of starter you don’t use during feeding. Most people simply throw it away: hence the name “discard”. But it doesn’t always have to go in the trash.
One of the best ways to use discard is in baking. From pancakes and waffles to crackers, cookies, and even pizza dough, there are endless recipes that put your extra starter to good use. Check out some of my sourdough discard recipes for inspiration.
You can also preserve discard by dehydrating it. Spread a thin layer onto parchment paper and leave it to dry completely. Once it’s brittle, you can store it in an airtight container or even mail some to friends who want to start their own sourdough journey.
And of course, if you can’t use it and don’t want to save it, it’s perfectly fine to toss it. Discard is a natural part of the feeding process, and the goal is to keep your active starter healthy and balanced.
Sourdough Discard Recipes
If you want any ideas for sourdough discard recipes, check out my recipes here.
FAQs About Feeding Starters
Q: How do I feed my sourdough starter?
A: Hi, welcome to the end of this blog that explains exactly how to feed my sourdough starter.
Q: How do I keep my starter warm enough?
A: A proofing oven or proofing box is the most reliable option, but you don’t need special equipment. An easy trick is to place your starter in the oven with just the light on. This creates a gentle, consistent warmth that helps fermentation along.
Q: Are older starters always better?
A: Not necessarily. While some people love the depth of flavor an older starter can bring, it really comes down to personal preference. A young, healthy starter can make incredible bread too. Arguably better than the old starter.
Q: Do I have to use filtered water, or is tap water okay?
A: Both work. As long as your tap water is safe to drink, it’s safe for your starter. That said, I personally prefer using filtered water for consistency.
Q: Do I have to make my own starter from scratch?
A: Not at all. There are plenty of places to buy dehydrated starter online or even from a local bakery. That’s how I got started.
How to feed Sourdough Starter
Simple beginner friendly sourdough starter feeding recipe.
2
minutesIngredients
125 g Sourdough Starter
125 g Water, Filtered prefered
125 g Flour, Bread
Directions
- Place container on scale and zero
- Add in 125g of starter
- Add in 125g of filtered water and mix until homogenous
- Add in 125g of flour, mix until fully combined and no dry spots remain
Notes
- Filtered water is preferred but tap will also work just fine.